
Now let’s see how the Rec709 preset, the standard used for HD video, behaves:
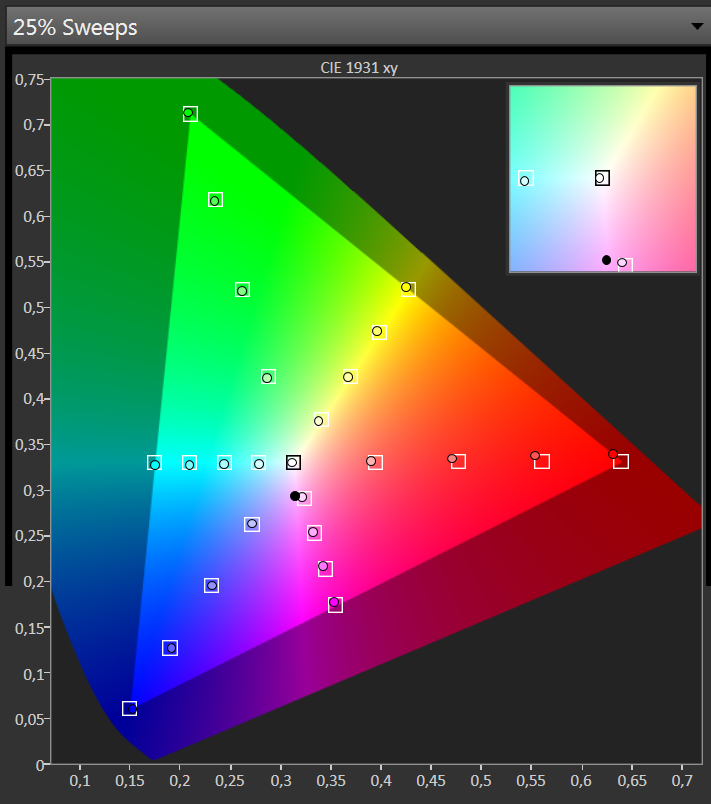
Analysis of the factory pre-calibrated Adobe Rec709 mode. In the graph on the right the circles indicate the location of the primary colors on the map; the little squares where they should be.
Surprisingly, although the brand does not announce that this comes calibrated, it is almost as good as the previous ones, with a maximum error of DeltaE 2.1, so those who are thinking of buying this monitor to use in video editing can be confident that it will more than meet expectations.
With respect to the official Technicolor certification, the brand does not indicate anything so I deduce that this model does not have it, which allows them to save on the final price. As you can see from the analysis above, this does not mean that the results aren’t equivalent to their predecessors, so it could perfectly be certified.
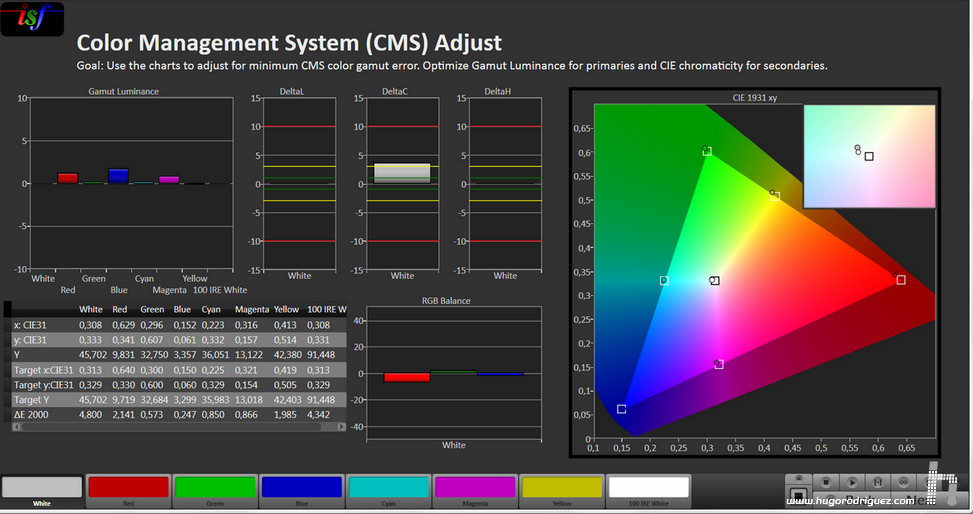
After testing the calibrated presets it’s time to test the full manual calibration, so I switched to the custom mode and calibrated based on manual adjustments in the menus. The grey curve was perfect, and without any “but”:
Next, and leaving the gamut set to Adobe RGB (the native), I had to touch only a little of the primary color deviation to get this result:
As you can see, it comes close to perfection. Only red deviates a little bit. With this setting, it would be enough to tell the operating system that the profile of the monitor is Adobe RGB, and it’s practically nailed.
Although this model incorporates a screen uniformization system, it doesn’t seem to have one because it’s not in the menus, while its predecessor the SW2700 did. This is because only factory pre-calibrated modes incorporate it.
As you can see, in Adobe RGB and sRGB modes the result is good. Only by increasing the contrast 1000% (by software to the photo, not the very screen) you can see how it is:
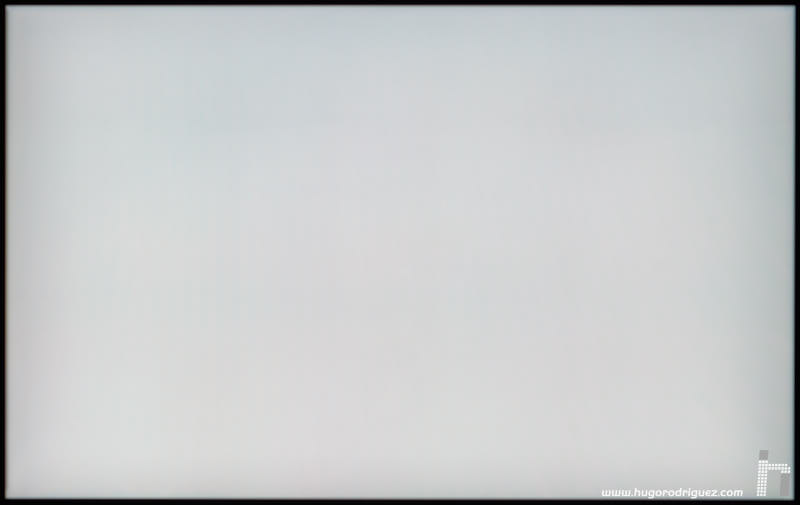
In this case you can see a very uniform screen, although you have to admit that in the sides the result is not as good as in the SW271, for example. Anyway, this is appreciated when the contrast is emphasized at 1000%, but with the naked eye it is difficult to see.
In the other modes and in the user mode there is no uniformity, but the truth is that it’s still pretty good, as you can see here:
The B/W mode
The black and white mode is interesting for those who like this technique. With this mode, the image becomes a perfect black and white. You can choose three different settings, in which the difference is the grey curve (gamma), which can produce more or less contrast. Here you can see the difference:
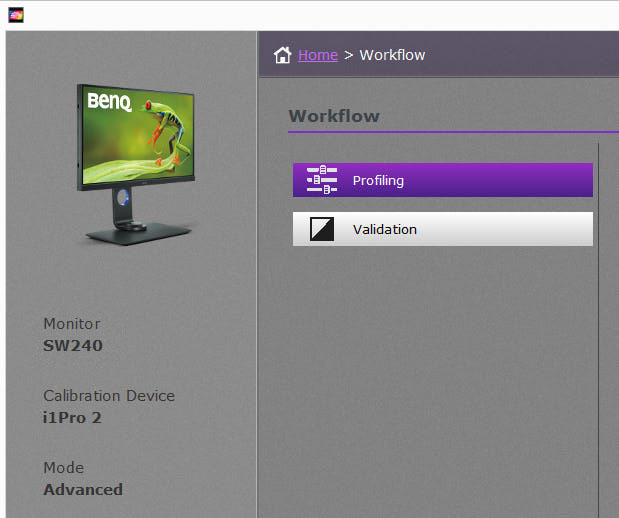
Hardware Calibration
Since this is a monitor that can be calibrated by hardware, it uses special software to calibrate not only the gamma curve (so that it adapts to that of the graphics card) but also its color space. In order to do this, a USB cable has to connect the computer and monitor, which allows the first one to upload and install the LUT that is going to take care of the color modifications in the second one.
The supplied software is called Palette Master Elements, which is the same for the SW271 or the SW320.

It is similar to X-Rite’s i1Profiler, although different. It is interesting to note that besides being compatible with X-Rite calibrators, it also works with Datacolor (Spyder).
In the initial screen you can choose the calibrator and choose between Basic or Advanced mode (in this case I choose the latter):
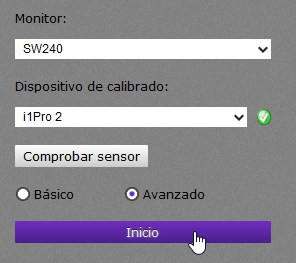
In this case I will use it with my EyeOne Pro2. Then choose if you want to profile or do a validation (which I will do when finishing the calibration).
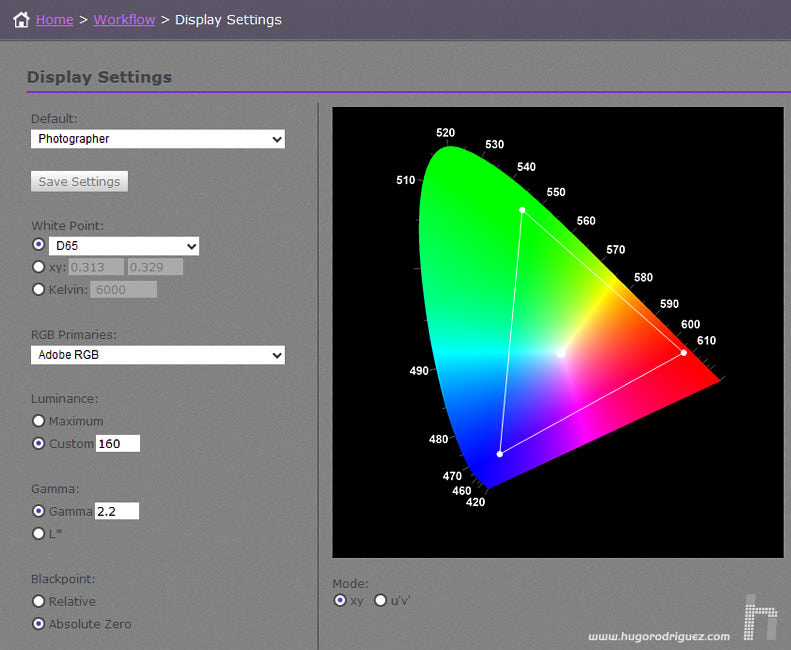
Once I select profiling, you can choose all the parameters: brightness, white point, gamma curve and black point (very interesting this last one).
Continues in page 6…